为什么选择 Astro
Astro 是一个现代化的静态站点生成框架,其核心目标是帮助开发者创建 快速、轻量、且以内容为核心 的网站。它于 2021 年首次发布,由于其独特的设计理念和对性能的极致追求,迅速在开发者社区中崭露头角。
推荐什么人适合 Astro
- 想亲手打造独具一格的博客
- 对编程有耐心
- 能读懂官方文档并原因钻研
本章目标
- 本地部署 Astro
- 部署到 Vercel 或 GitHub Pages
- 配置主题并优化
所需环境
- node >= 18.14.1
- 文本编辑器(VsCode)
部署基础模板
在 Git 中使用命令部署 astro
npm create astro@latest第一个选项是命名,可以自己更改
第二个选项是我们选择使用 blog 模板
第三个我们选择 yes,安装所需依赖
第四个选项 git 仓库初始化,可以先不选
![[使用Astro搭建博客-202504031206.png|500]]
使用主题模板部署 Astro 博客
如果你不想使用 astro 的模板,GitHub 有许多开发者提供的模板
这里我选择的是 Fuwari.
首先我们先去 fork 或拉取这个仓库
clone 到本地后依次执行以下命令
# 如果你尚未安装pnpm,执行如下命令
npm install -g pnpm
# 执行下面两个,安装依赖
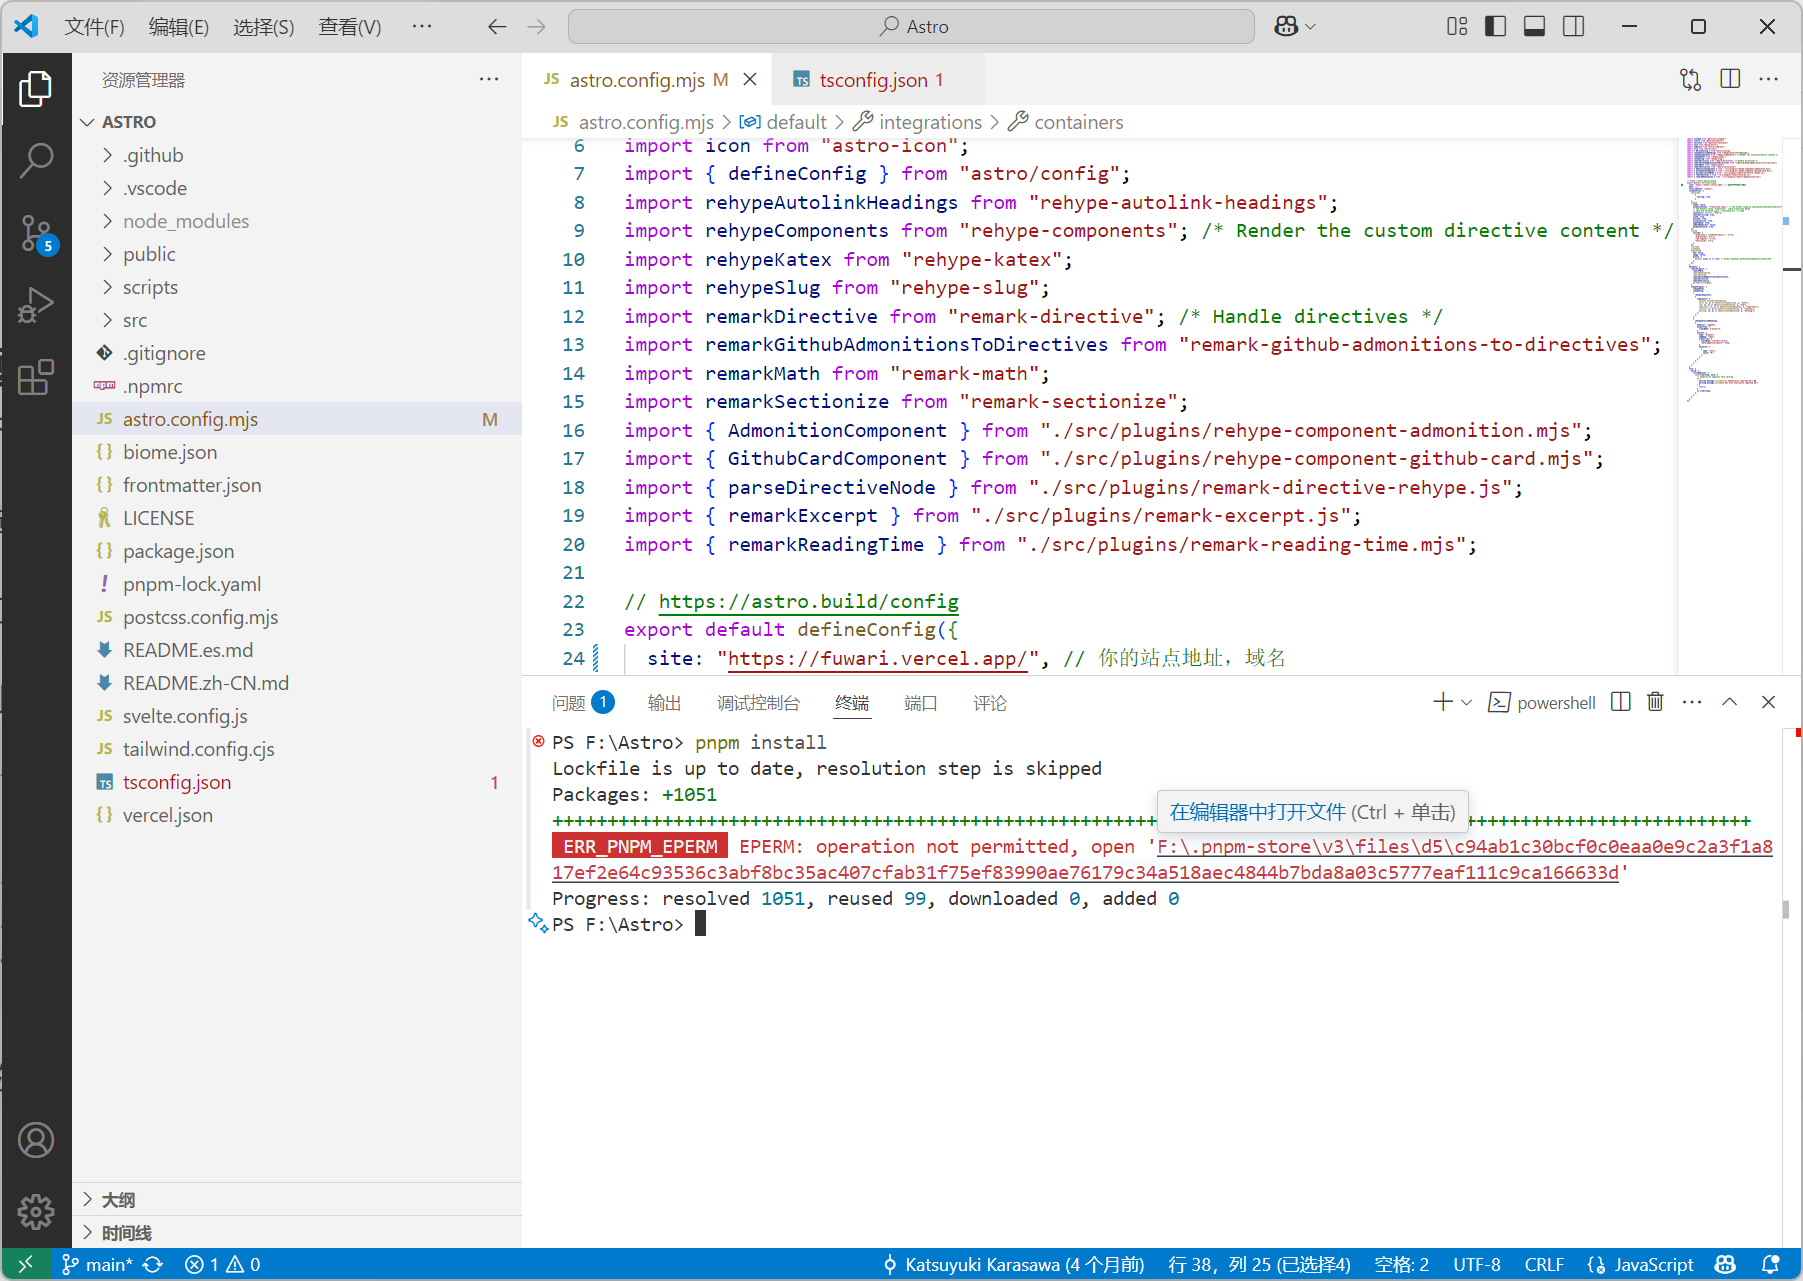
pnpm install
pnpm add sharpPS:如果你 pnpm install 失败,可能是
.pnpm - store目录的权限不允许用户进行读写操作,去把对应的. pnpm-store 文件夹=>属性,将权限全开即可
安装好所需依赖后,在终端执行 npm run dev 即可本地构建运行
Vercel 部署
进入 Vercel,选择自己 fork 的仓库,一路确认即可
主题配置
在 src/config.ts 进行站点配置
页面配置
关于页面
在 src\content\spec\about.md 进行配置
由于 Astro 使用的是 MDx,所以你可以一边写 md 一边写 html,感觉挺有意思
创建页面
不想配图... 参考别人的叭
参考文章
添加一个系列页面
参考文章
日期修改
我 Obsidian使用的日期是 date, 但是主题用的是 published,得替换一下
修改 src\content\config.ts
//src\content\config.ts
import { defineCollection, z } from 'astro:content'

const postsCollection = defineCollection({
  schema: z
    .object({
      title: z.string(),
      date: z.coerce.date().optional(), // 兼容Obsidian date 字段
      published: z.coerce.date().optional(),
      updated: z.coerce.date().optional(),
      draft: z.boolean().optional().default(false),
      description: z.string().optional().default(''),
      image: z.string().optional().default(''),
      tags: z.array(z.string()).optional().default([]),
      category: z.string().optional().default(''),
      lang: z.string().optional().default(''),

      /* For internal use */
      prevTitle: z.string().default(''),
      prevSlug: z.string().default(''),
      nextTitle: z.string().default(''),
      nextSlug: z.string().default(''),
    })
    .transform((data) => {
      // 自动将 date 赋值给 published(如果 published 不存在)
      return {
        ...data,
        published: data.published ?? data.date, // 使用 ?? 避免 falsy 值问题
      }
    }),
})

export const collections = {
  posts: postsCollection,
}
修改底部信息
在 src\components\Footer.astro,我们可以看到底部信息并进行编辑。这里我用的是不蒜子加上日期计数器
<div class="framework-info">
  Powered by: 🪐 <a href="https://astro.build/">Astro</a> +
  <a href="https://github.com/saicaca/fuwari">Fuwari</a>✨
  <br />
  <!--不蒜子计数器-->
  <script async src="//busuanzi.ibruce.info/busuanzi/2.3/busuanzi.pure.mini.js"></script>
  <!--添加一个访问量-->
  <span
    >本"<span style=" color: hsl(192 98% 55%); font-weight: bold; ">页面</span>"访问
    <span id="busuanzi_value_page_pv" style=" color: hsl(192 98% 55%); font-weight: bold; "></span>
    次 | 👀总访问
    <span id="busuanzi_value_site_pv" style=" color: hsl(192 98% 55%); font-weight: bold; "></span>
    次 | 总访客
    <span id="busuanzi_value_site_uv" style=" color: hsl(192 98% 55%); font-weight: bold; "></span>
    人</span
  >
  <br />
  <!--运行时间 -->
  <script type="text/javascript">
    function runtime() {
      const t = new Date('09/01/2024 08:00:00'),
        n = new Date(),
        s = n - t,
        e = Math.floor(s / 1e3),
        o = Math.floor(e / 86400),
        i = Math.floor((e % 86400) / 3600),
        a = Math.floor((e % 3600) / 60),
        r = e % 60
      document.getElementById('runningtime').innerHTML =
        `⏱️本站已运行: ${o}天${i}小时${a}分${r}秒 ☁️`
    }
    setInterval(runtime, 1e3)
  </script>
  <div class="transition text-50 text-sm text-center hidden md:block"><p id="runningtime"></p></div>
</div>
自定义字体
我们可以根据官方文档使用自定义字体 | Docs
这里我选择取巧进行外部文件注入
在 src\components\Navbar.astro 的末尾或合适位置注入你想使用的字体资源,以落霞孤鹜为例
<link
  rel="stylesheet"
  href="https://cdn.bootcdn.net/ajax/libs/lxgw-wenkai-screen-webfont/1.7.0/style.min.css"
/>
<style>
  body {
    /* 屏幕优化版 */
    font-family: 'LXGW WenKai Screen', sans-serif;
  }
</style>
然后保存,就能看见站点字体已发生改变
修改代码块样式
教程来源伊卡
添加 Waline 评论(归档)
组件导入
组件完整代码
<!-- 1. 先静态显示阅读量/评论数的骨架屏 -->
<div id="waline-info">
  <div style="display: flex; align-items: center;">
    阅读量: <span class="waline-pageview-count" style="margin-left: 5px;">--</span>
  </div>
  <div style="display: flex; align-items: center;">
    评论数:<span class="waline-comment-count" style="margin-left: 5px;">--</span>
  </div>
</div>

<!-- 2. 评论容器(初始为空) -->
<div id="waline"></div>

<!-- 3. 异步加载逻辑 -->
<script is:inline>
  ;(async () => {
    const loadCSS = () => {
      const link = document.createElement('link')
      link.rel = 'stylesheet'
      link.href = 'https://unpkg.com/@waline/client@v3/dist/waline.css'
      document.head.appendChild(link)
    }

    const { init } = await import('https://unpkg.com/@waline/client@v3/dist/waline.js')

    const initWaline = () => {
      const isDark = document.documentElement.classList.contains('dark')
      init({
        el: '#waline',
        serverURL: 'https://waline.blueke.top/',
        dark: isDark ? 'html.dark' : false,
        pageview: true,
        comment: true,
        emoji: [
          'https://gcore.jsdelivr.net/gh/norevi/waline-blobcatemojis@1.0/blobs',
          'https://cdn.jsdelivr.net/npm/@waline/emojis@1.3.0/qq',
        ],
      })
    }

    // 并行加载资源
    loadCSS()
    initWaline()

    new MutationObserver(() => {
      const container = document.getElementById('waline')
      if (container?.innerHTML) {
        container.innerHTML = ''
        initWaline()
      }
    }).observe(document.documentElement, {
      attributes: true,
      attributeFilter: ['class'],
    })
  })()
</script>

<style>
  #waline-info {
    display: flex;
    justify-content: space-between;
    align-items: center;
    margin-bottom: 10px;
  }
  #waline {
    clear: both;
  }

  .waline-pageview-count::before,
  .waline-comment-count::before {
    content: '';
    display: inline-block;
    width: 1em;
    height: 1em;
    background: #eee;
    animation: pulse 1.5s infinite;
    vertical-align: middle;
    margin-right: 0.3em;
  }
  @keyframes pulse {
    0%,
    100% {
      opacity: 0.5;
    }
    50% {
      opacity: 1;
    }
  }
</style>
然后我们只需要在需要评论的页面下引用组件
<Waline />参考文章
官方网站 Astro